Activity Registration
Start-Up Guide
Start-Up Guide for Parents
August 2024
Welcome to the rSchoolToday Activity Registration Quick Start Guide for Parents. This guide will help you to:
1. Register a New User
2. Log in
3. Register to an Activity
4. Finish Incomplete Registrations
5. View your Family Account
Note that Some settings or options may vary depending on your School Settings for the Registration Form.
1. REGISTER A NEW USER
To Register as a new User, click on the View My Account button on your homepage. Then, under New Users, click on the Create New Account button. If you have previously created an account and want to register for an activity, proceed to Step 3.
To create a New User, fill in the form with the parent's/guardian's information, and choose a username and password.
Confirm your Activity Registration account by clicking on the link sent to you via email.
You will be redirected to the Activity Registration page.
When you receive the confirmation message, click on the link to log in automatically.
2. LOG IN
If you already have an account, go to View My Account and click on Login to My Account.
Note: Existing users with passwords that do not meet the new requirements will be prompted to update them on a designated screen.
3. REGISTER FOR AN ACTIVITY
To register for an activity, click the Registration tab on the Homepage.
If you are already Logged in, click the Register link on your Family Account Module.
Step 1- Select Student: To register a new Student, the Add New Student option must be selected from the “Select Student” dropdown menu. If there are existing registered students, select the name from the list.
Note: Some fields might auto-populate the next time you complete a Registration Form. It will depend on the School Settings for each Registration Form.
Step 2 – Select Activity: Choose the Activities you want this Student to register and click Next Page.
Step 3 - Parent/Guardian Info: Enter the Parent/Guardian information. You can also add the details for the second Parent/Guardian.
Step 4 - Physical Forms: Upload the Physical Form and enter its date. The validity may be automatic depending on the school's settings for this registration form. If this step is not required you can add the physical form later.
Step 5 - Medical information: The information requested on this step depends on the data that is required by the school for the Activity Registration.
Step 6 - Policies and Agreements: This contains the School's Policies and Agreements. Click on the attached file to view/read them and check off the boxes to agree.
In the Checkout Page, review the registration details and click the Submit button to complete.
 Note: The payment options may not be available for Schools that do not require fees for their Activities.
If you choose Credit Card as payment method, you will be redirected to the following screen.
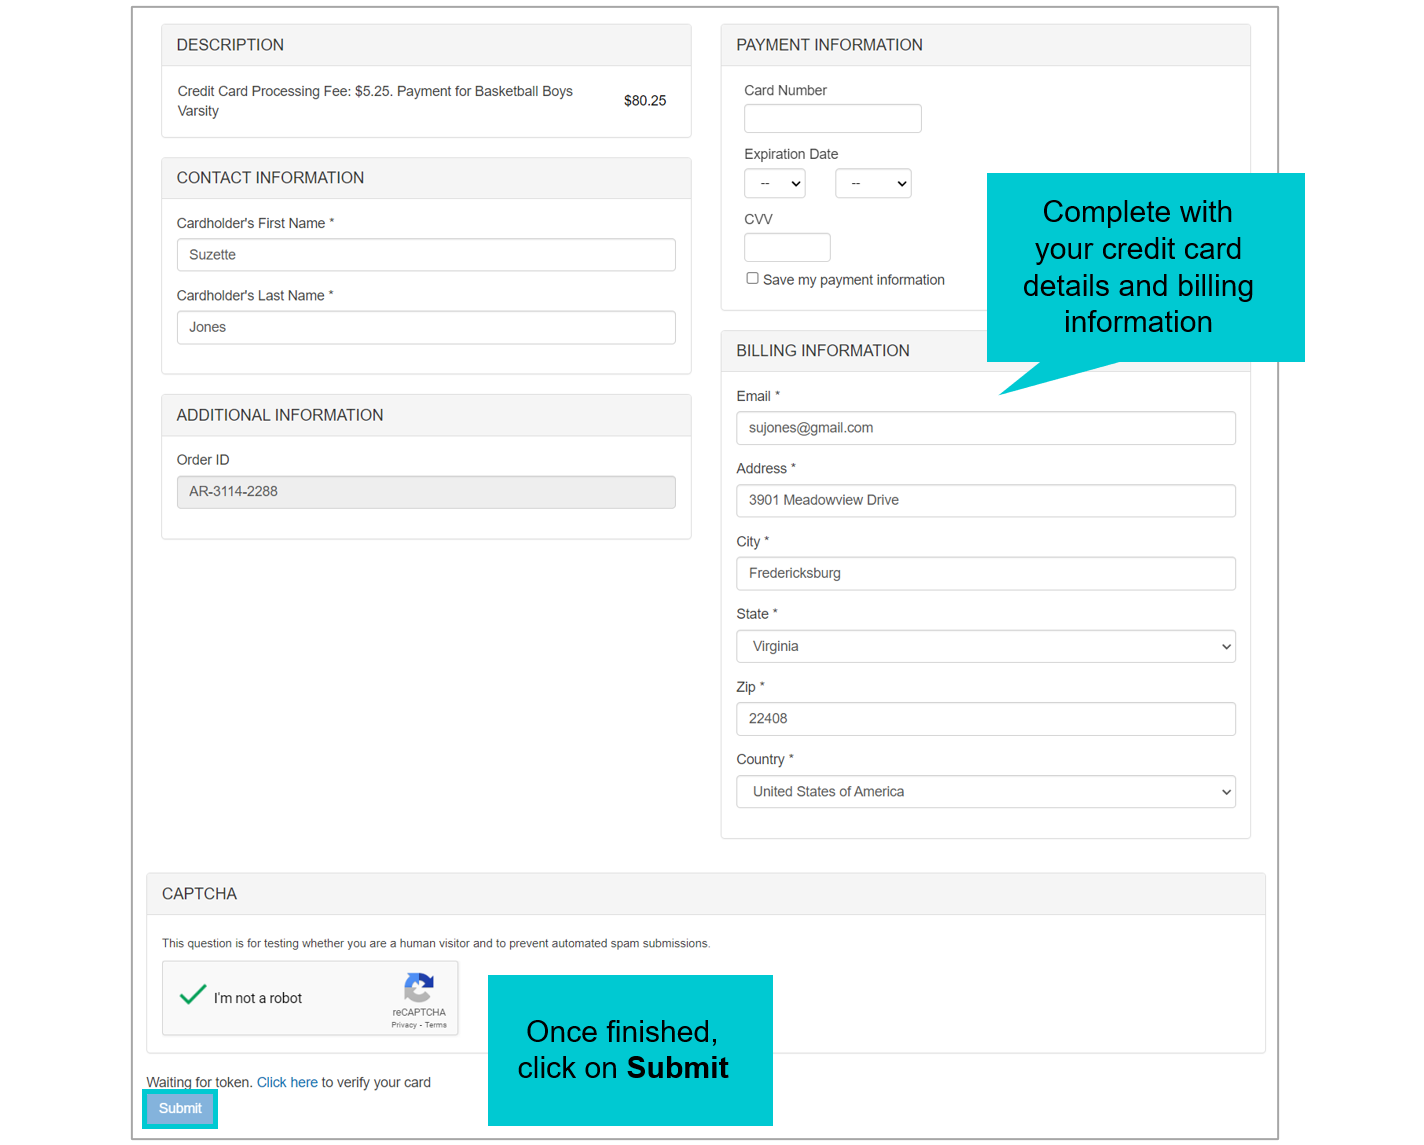
Now, you have completed your Registration.
Once you submit your registration, it will be listed under Registration History.
4. FINISH INCOMPLETE REGISTRATIONS
You can click the Save and Finish Later button at any time during the Registration process. To resume that Registration, go to Registration History and click on the Incomplete Registration link.
5. FAMILY ACCOUNT
In the Family Account module, you can find information about your Registration History, Family Member info, Important Dates, and Account Settings.
Listed on the Registration History tab, you will find all the Registrations made for your Family members. You can see the Final Clearance Status and view the Registration Form.
From this tab, you can also Register to an Activity, or finish an Incomplete Registration.
In the Refund/Credit History tab, you will be able to see the credit added to your account, as well as any refund you may have.
 In the Family Member Info tab, you can add, edit or delete the Student’s Information, Parent/Guardian’s information, and Credit Cards.
In the Important Dates tab, Physical Date and other Test Dates are shown on this tab. These dates are not editable and the fields are disabled.
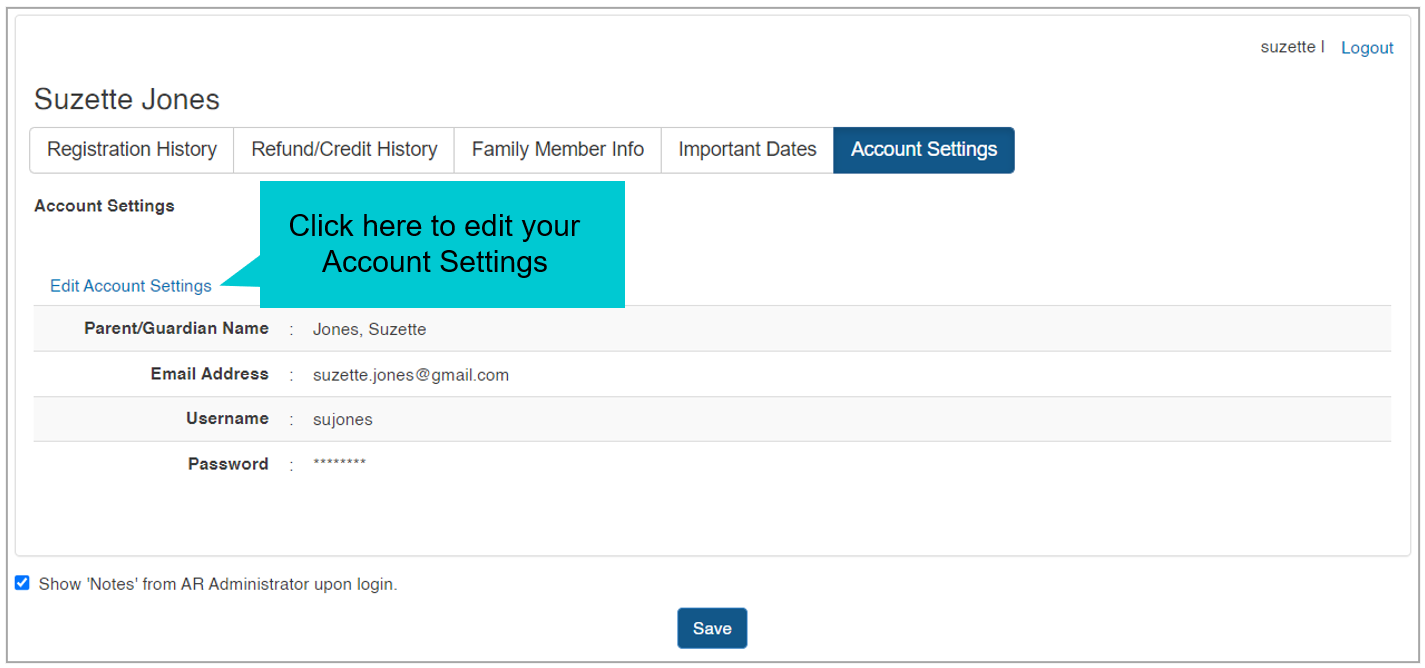
On Account Settings, you can modify your name, email, username, and password.


 Back
Back